Haier Air Conditioner Troubleshooting
Your Haier AC just stopped blowing cold air. Or it's flashing a code you've never seen. Or worse, there's water pooling on the floor and you're not sure where it's coming from.
When your air conditioner acts up, especially during a heatwave, waiting days for a repair is frustrating. That's why understanding Haier Air Conditioner Troubleshooting saves time, money, and frustration.
Most Haier AC issues fall into predictable categories. Manufacturer specifications indicate that roughly 70 percent of service calls stem from problems the owner could have solved with basic checks: a dirty filter, a clogged drain line, or a dead remote battery. Modern Haier units include built-in self-diagnostic systems that display specific error codes.
Let's walk through each problem step by step so you can decide whether this is a five-minute fix or a call-the-pro situation.
Quick Answer
Haier air conditioner troubleshooting starts with reading the error code. Check the display or count the LED flashes. Match the code to the problem in your manual.
Try a hard reset by unplugging the unit for five minutes. Clean the filter. Clear the drain line.
If the issue persists, call a certified technician.

Image source: Bing (Web (fair-use with source credit))
Understanding Haier AC Error Codes – What That Flashing Light or Code Really Means
Haier builds diagnostic capability directly into its air conditioners. When something goes wrong, the unit displays a code. Understanding what that code means is the fastest path to knowing whether you can fix it yourself or need professional help.
The Most Common Haier Error Codes at a Glance
Let's start with the codes you're most likely to see. These appear across Haier's split systems, ductless mini-splits, window units, and portable models. The specific code format can vary slightly depending on your model, but the meaning is consistent.
| Error Code | What It Means | Likely Cause | Can You Fix It? |
|---|---|---|---|
| E1 | Room temperature sensor failure | Bad thermistor or wiring | Usually needs a pro |
| E2 | Evaporator pipe sensor failure | Pipe thermistor open or shorted | Usually needs a pro |
| E3 | Condenser sensor failure | Outdoor unit thermistor | Usually needs a pro |
| E4 | Display panel communication error | Loose wire or PCB issue | Maybe — check connections first |
| E7 | Outdoor fan motor or fan lock | Fan seized, capacitor bad | Needs a pro |
| F1 | Indoor fan motor failure | Motor or control board | Needs a pro |
| F4 | Four-way valve fault (heat pumps only) | Reversing valve stuck | Needs a pro |
| P0 | IPM module protection | Inverter board overcurrent | Needs a pro |
| P1 | Overvoltage or undervoltage | Power supply issue | Check outlet voltage first |
| U0 | Refrigerant leakage detected | Low refrigerant charge | Needs a pro — EPA rules apply |
| U4 | Communication error indoor/outdoor | Wiring or board fault | Check connections, then call pro |
Not all models display codes the same way. Some newer units show the code on the main display. Older window units use a sequence of LED flashes. Count the blinks and check your manual. If you don't have the manual, Haier's official support site has downloadable versions for every model.
How to Read Your Haier Model's Specific Error Code
Your first move depends on what you're seeing.
If the unit has a digital display and shows an alphanumeric code, write it down exactly. Some codes flash slowly, some rapidly, some stay solid. Take a photo with your phone.
If the unit doesn't have a display but has an LED indicator, look at the light pattern. A single blink followed by a pause means something different than three rapid blinks. Your manual will have a table mapping blink patterns to error conditions.
If there's no display and no blinking light, the unit may be old enough that it doesn't include self-diagnostics. In that case, you're working purely from symptoms. The following sections handle that situation too.
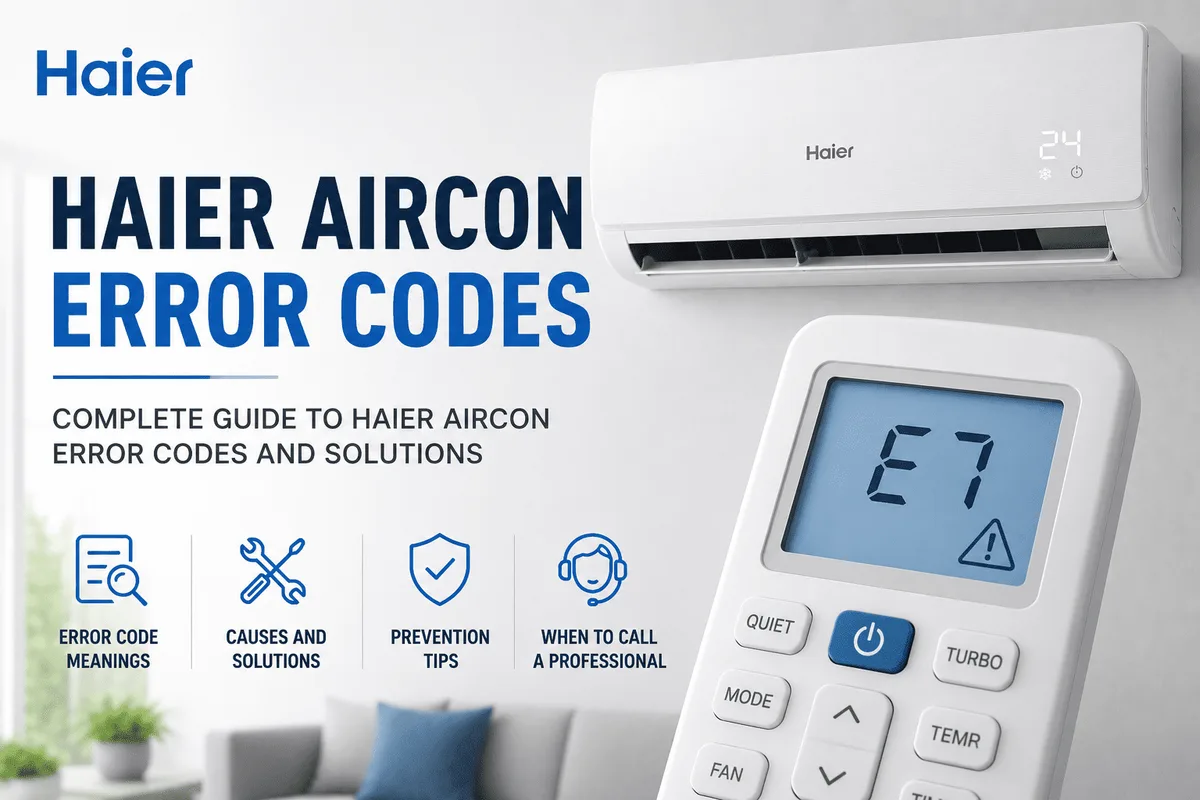
Image source: Bing (Web (fair-use with source credit))
One important note: error codes are a starting point, not a final diagnosis. A sensor error like E1 or E2 could be a bad sensor, a loose wire, or a bad connection on the control board. The code tells you where to look, but not always exactly what's broken.
That's why the next step is always the same: try a hard reset before you do anything else.
Step-by-Step Troubleshooting for the Most Common Problems
Most Haier AC problems fall into five categories. Start with the simplest possible cause and work your way up. Skipping easy checks is the number one mistake homeowners make.
Problem A: Unit Won't Turn On or No Power
If your Haier AC shows no signs of life, this is a power issue until proven otherwise. Do not assume the unit is broken.
Check the outlet first. Plug something else into the same outlet. If dead, check your breaker panel for a tripped breaker. Reset it fully by flipping off and then on. If it trips again immediately, you have a wiring problem and need an electrician.
For window units, check the GFCI outlet. Many plug into GFCI-protected outlets, and the GFCI can trip without the breaker flipping. Press the reset button on the outlet.
If the outlet has power but the unit won't start, check the remote control. A dead remote battery is a common reason people think their AC is broken. Replace the batteries with fresh ones. If the unit has a physical power button, press that to confirm the remote is the issue.
For split systems and ductless mini-splits, look at the unit's own circuit breaker or disconnect switch. Some installations include a dedicated disconnect box near the outdoor unit. If that switch is off, the indoor unit won't power up.
If none of these resolve the issue, the problem is likely internal. A blown fuse on the indoor PCB is common after a power surge. This requires opening the unit's electrical compartment, which we strongly recommend leaving to a professional unless you have electrical troubleshooting experience.
Problem B: AC Blows Warm Air or Isn't Cooling
This is the most frustrating symptom. The unit runs, the fan blows, but the air is not cold.
Start with the thermostat setting. If the unit is set to fan-only mode, it will blow air without cooling. Switch to cool mode and set the temperature at least five degrees below the current room temperature. Wait five minutes.
If still not cold, clean the air filter. A clogged filter restricts airflow, causing the evaporator coil to get too cold and freeze over. When the coil freezes, cooling stops. This is the single most common cause of "running but not cooling." Remove the filter, hold it up to the light. If you can't see through it, wash with mild soap and water, dry completely, reinstall. Wait an hour for any ice to melt before testing.
If the filter is clean and you're still getting warm air, check the outdoor unit. For split systems, the outdoor condenser needs airflow to reject heat. If the outdoor coil is packed with leaves, dirt, or debris, the system can't release heat effectively. Hose it off gently. Make sure the outdoor fan is spinning. If the fan isn't running, the condenser can't shed heat.
If the outdoor fan runs but the air is still warm, the system may be low on refrigerant. Low refrigerant causes the same symptom as a dirty filter, but fixing a leak is not a DIY job. It requires specialized tools, EPA Section 608 certification, and ability to locate and repair the leak. Call a pro.
Problem C: Water Leaking Inside or Outside the Unit
Water leaks are common and usually simple to fix. The cause is almost always a drainage issue. Haier units collect condensation on the evaporator coil and drain it away. When the drain path is blocked, water finds another way out.
For window units, check the tilt. Window units need to be tilted slightly backward so water runs to the drain pan and out the rear. If tilted forward, water drips into your room. Adjust the bracket or shims. Also check that the drain hole on the underside is not blocked by dirt or insects.
For split systems, the most likely cause is a clogged condensate drain line. The plastic pipe from the indoor unit to the outside can develop algae, mold, and dust plugs. Water backs up and overflows from the indoor unit. You'll see water dripping from the bottom of the wall-mounted unit.
To clear the drain line, locate the end of the pipe outside. Use a wet/dry vacuum to suck the blockage out. If that doesn't work, blow compressed air through the line. Some units have a cleanout port near the indoor unit. If still clogged, disconnect the line and snake it clear.
If the drain line is clear but water is still leaking, check the drain pan. Over time, drain pans can crack or rust through. A cracked pan needs replacement, which requires removing the indoor unit – a job for a technician.
Problem D: Ice Buildup on Coils or Copper Lines
Frost or ice on the copper refrigerant lines or indoor coil signals something wrong. Ice doesn't happen on a properly functioning AC. The most common cause is restricted airflow. When airflow drops, the coil gets colder than designed, and moisture freezes. Fix: check and clean the filter.
If you find ice, turn the unit off completely and let it thaw. This can take several hours. Do not chip the ice – you'll damage the coil fins.
Once ice is gone and filter is clean, restart the unit. If ice returns, the problem is likely low refrigerant. Low refrigerant causes coil temperature to drop below freezing even with normal airflow. This requires a technician. Adding refrigerant without fixing the leak is illegal under EPA regulations.
For heat pump models running in heating mode, ice on the outdoor unit during defrost cycles is normal. The defrost cycle is designed to melt ice that forms on the outdoor coil during cold operation. If the ice doesn't melt after 15 to 20 minutes, the defrost cycle may be malfunctioning – call a technician.
Problem E: Strange Noises – Rattling, Clicking, Hissing
Air conditioners make sounds. Some are normal, some are warning signs.
A soft whooshing sound is normal – refrigerant flowing through the expansion valve. A gentle hum from the compressor is also normal. The outdoor unit makes more noise than the indoor unit, especially when the compressor kicks on.
A loud clicking sound when the unit starts or stops is normal for non-inverter models – the contactor engaging and disengaging. If the clicking is rapid and continuous, the contactor may be failing – simple replacement for a technician.
A rattling sound usually means something is loose. Check fan blades on both units. A blade slightly bent or out of balance will rattle against the housing. Also check for loose screws or panels. Tighten anything that moves.
A hissing sound can indicate a refrigerant leak. If you hear a steady hiss, especially from the outdoor unit or along the copper lines, turn the system off immediately. Refrigerant leaks reduce cooling and are harmful to the environment. Not a DIY fix.
A banging or thumping sound from the outdoor unit may indicate the compressor is struggling – can happen when the compressor is failing or when operating with bad capacitors. Shut the system off and call a technician.
When Your Remote Control is the Problem – Not the AC
Before tearing into wiring or calling a technician, consider that the air conditioner itself may be fine. Remote control issues account for a surprising number of "broken AC" calls.

Image source: Bing (Web (fair-use with source credit))
Remote Not Responding at All
If the unit runs fine with physical buttons but won't respond to the remote, the problem is in the remote or the communication link. Replace the batteries first with fresh alkaline batteries (rechargeables often have lower voltage). If new batteries don't help, check the infrared emitter on the front of the remote. Look at it through your phone camera while pressing a button – you can see the IR light flashing. If no flash, the emitter is dead and the remote needs replacement.
If the remote is working but the AC isn't responding, something might be blocking the IR receiver on the unit. Clean the receiver window with a soft cloth. Remove any sticker, dust, or obstruction.
Remote Works Intermittently
Intermittent issues are often caused by weak batteries. Replace them anyway. If that doesn't help, check for interference. Bright sunlight can overwhelm the IR signal. Reflective surfaces can confuse it. Move closer and aim directly at the receiver.
Some Haier units have a remote control lockout feature. If the display shows a lock icon, the remote has been disabled. Press and hold the mode or temperature up button for five seconds to unlock it. The exact method varies by model.
If you've tried all these and the remote still doesn't work consistently, a replacement remote is the easiest fix. Haier remotes are model-specific. Generic universal AC remotes exist but often don't support all Haier functions like sleep mode or self-clean.
How to Properly Clean and Maintain Your Haier AC – The Real Fix for Half Your Issues
Roughly half of all Haier AC service calls could have been prevented with basic maintenance. The unit wasn't broken – it was neglected. A clean, well-maintained AC runs more efficiently, cools better, and lasts longer.
Filter Cleaning – The Right Way and How Often
The air filter is the AC's first line of defense and most common point of failure. A dirty filter restricts airflow, causes the evaporator coil to get too cold, leads to ice buildup, stops cooling, and then you call a technician. The fix is free.
Clean the filter every two weeks during heavy use. If you have pets, smoke indoors, or live in a dusty area, clean it weekly.
To clean, remove the filter from the unit. Most slide out from the front panel. Hold it up to the light – if you can't see through, it's dirty. Vacuum both sides with a brush attachment, then wash with lukewarm water and mild dish soap. No harsh chemicals or hot water. Rinse thoroughly and let air dry completely before reinstalling. A wet filter will trap dust and mold.
Some Haier models include electrostatic or antimicrobial filters that can be cleaned but eventually need replacement every six to twelve months.
Drain Line Clearing – Step by Step
The condensate drain line is a plastic tube that carries water from the indoor unit to the outside. Algae, mold, and slime build up inside. When the line clogs, water backs up and overflows – you panic, but the fix takes ten minutes.
You'll need a wet/dry vacuum with a hose attachment. Locate the drain line exit point outside (small white or gray PVC pipe for wall-mounted split units; a hole or spout on the underside for window units).
First, try the vacuum method. Place the vacuum hose over the end of the drain line, create a seal with your hand or a rag, and run the vacuum for thirty seconds. Suction usually pulls the clog out. You'll see water or debris in the canister.
If vacuuming doesn't work, try blowing compressed air through the line. Some units have a cleanout port near the indoor unit. Remove the plug and use compressed air.
If neither method works, disconnect the drain line and manually clear it with a flexible brush or snake.
Once clear, pour a cup of distilled white vinegar down the drain opening to kill algae and prevent future buildup. Do not use bleach – it damages the drain pan and copper coil.
Coil Care – Indoor and Outdoor
The evaporator coil (indoor) and condenser coil (outdoor) both need to be clean. Dirty coils reduce heat transfer, causing the unit to work harder, use more energy, and cool less effectively.
For the indoor coil, access is behind the air filter. If the filter has been doing its job, the coil should stay relatively clean. Over time, fine dust can accumulate. Clean with a soft brush and coil cleaner spray designed for AC units. Do not use water alone – purpose-made cleaner emulsifies the dirt.
For the outdoor unit, turn the power off. Remove debris around the unit (leaves, grass, dirt). Use a garden hose to gently spray the coil from the inside out – pushes dirt out the way it came. Do not use a pressure washer – it bends delicate coil fins. If fins are bent, straighten them gently with a fin comb. Clean the outdoor coil at least once a year, preferably in spring. If in a dusty area or near construction, clean more often.
The Inverter vs. Non-Inverter Difference – Why It Matters for Troubleshooting
Not all Haier air conditioners are built the same. The biggest difference is inverter vs. non-inverter technology. This matters because the two types fail differently.
Non-inverter units (fixed-speed) have a compressor that runs at full speed until the room reaches set temperature, then shuts off entirely. They cycle on and off. They're simpler mechanically and electrically. Common failures: capacitor, contactor, or fan motor.
Inverter units use a variable-speed compressor that runs continuously but adjusts speed based on demand. More energy-efficient and quieter, but more complex. Inverter units have an inverter board or IPM module controlling compressor speed. When an inverter unit fails, the problem is often on that board.
Common Inverter-Specific Issues
If your inverter unit shows error code P0, that's IPM module protection – the inverter board detected an overcurrent condition and shut down. This can happen due to a bad compressor, a shorted wire, or a failing board. Resetting the unit sometimes clears a temporary fault. If the code returns, the board likely needs replacement.
Inverter units are more sensitive to power quality. Frequent brownouts or voltage fluctuations can cause premature inverter board failure. A whole-house surge protector is a good investment.
Non-Inverter (Conventional) Unit Issues
Non-inverter units have fewer electronics but more mechanical wear. The compressor starts and stops many times per day, stressing components.
The most common failure is a bad capacitor. Capacitors store electrical energy to help start the compressor and fan motors. When a capacitor fails, the compressor may hum but not start, or the fan may spin slowly or not at all. Replacing a capacitor is straightforward for a technician and relatively inexpensive, but not a DIY job – capacitors can hold a lethal charge even when unplugged.
Contactors are another common failure point. A contactor is a switch that turns the compressor on and off. When it wears out, it can stick closed (compressor runs constantly) or fail to engage (compressor never starts). Both require professional replacement.
Common Mistakes That Make Haier AC Problems Worse
People make the same mistakes over and over. These errors turn manageable problems into expensive repairs.
Skipping the Filter Check First
The most common mistake is assuming a complex failure before checking the simplest cause. The unit isn't cooling – you think low refrigerant and call a technician. The technician shows up, cleans the filter, and charges a diagnostic fee. The filter was clogged, the system was frozen. Always check the filter first.
Using the Wrong Tools or Methods
Pressure washing the outdoor coil bends fins and reduces efficiency. Bleach to clean the drain line damages components. Using a metal tool to chip ice off the coil punctures refrigerant lines. Each creates a bigger problem.
Use a garden hose, not a pressure washer. Use vinegar, not bleach. Let ice melt naturally.
Ignoring Error Codes Before Resetting
When an error code appears, some people immediately unplug the unit to make it go away. The code disappears, the unit runs, they think it's fixed. But the code existed for a reason. Ignoring it lets the underlying problem continue and usually worsen. Write down the code, look it up, understand what it means, then decide whether a reset is appropriate.
Adding Refrigerant Without Fixing the Leak
Refrigerant does not get consumed or wear out. If the system is low on refrigerant, there is a leak. Adding more without fixing the leak is like topping off oil in a car with a hole in the oil pan. The refrigerant will leak out again. Furthermore, adding refrigerant without proper equipment and EPA Section 608 certification is illegal.
Forgetting the Outdoor Unit
Many homeowners treat the indoor unit as the whole system. The outdoor unit needs attention too. If the outdoor coil is dirty or the fan isn't spinning, the entire system suffers. Check the outdoor unit at least once per season. Clear debris, hose off the coil, make sure the fan spins freely.
When to Reset Your Haier AC – And How to Do It Correctly
Before you call anyone, try a reset. Many Haier AC issues are temporary glitches that a reset will clear. The unit's control board can get confused by a power surge, brownout, or voltage dip. A reset forces the board to reboot fresh.
The 5-Minute Hard Reset
This is the most effective reset method and works on nearly every Haier model. Turn the unit off using the remote or physical button. Then unplug from the wall outlet. For hardwired split systems, flip the dedicated breaker to off.
Wait five full minutes. Set a timer. Internal capacitors need time to discharge completely. If you plug back in after thirty seconds, the board may still hold residual charge and won't reset properly.
After five minutes, plug back in or flip the breaker on. Wait thirty seconds for the board to initialize. Turn the unit on using the remote. In many cases, the error code will be gone and the unit will run normally.
If the error code returns immediately after the reset, the problem is not a glitch. Proceed with troubleshooting steps.
Factory Reset via Remote (Select Models)
Some Haier units support a factory reset through the remote control. This restores all settings to default, fixing issues caused by incorrect configuration.
To perform a factory reset, turn the unit off. Press and hold the Mode and Swing buttons simultaneously for five seconds. The display should show a confirmation message or the unit should beep. Release buttons and turn the unit back on. Note: this clears all settings, including timers, temperature preferences, and Wi-Fi connections.
DIY vs. Calling a Pro – How to Know When You're Out of Your Depth
This is the most important decision. Fixing things yourself saves money. But fixing the wrong thing costs more than calling a pro. And some repairs are genuinely dangerous.
Issues You Can Safely Handle Yourself
You can safely clean the filter, clear the drain line, clean the outdoor coil. Check and replace remote batteries. Reset the unit. Check the breaker and outlet. Adjust the position of a window unit. None require specialized tools or training. You can also visually inspect for obvious problems like a bent fan blade, loose panel, or blocked outdoor unit.
Issues That Require an HVAC Professional
Call a professional for anything involving the refrigeration circuit: low refrigerant, refrigerant leaks, any work that requires opening the sealed system. EPA Section 608 requires certification to handle refrigerant – you can't legally buy it without.
Call a pro for electrical issues inside the unit: replacing a capacitor, contactor, fan motor, or control board involves live voltages that can kill you. Even unplugged, capacitors can hold a lethal charge. This is not a place to learn by trial and error.
Call a pro for compressor failures. The repair is expensive and requires specialized equipment. A professional will also check for root causes like a bad start kit or failing run capacitor.
Call a pro for refrigerant leak repairs. The leak must be located, repaired, and the system evacuated and recharged to the manufacturer's specified weight (measured in ounces). Getting it wrong affects performance.
What a Service Call Will Typically Cost
A standard diagnostic fee runs between 75 and 150 dollars. Repairs add cost: capacitor replacement 150–250 dollars, fan motor replacement 300–600 dollars, refrigerant repair and recharge 400–800 dollars, compressor replacement can exceed 1,500 dollars.
Compare to a new window unit starting around 300 dollars. If your unit is over ten years old and requires a major repair, replacement is often the better financial decision.
Frequently Asked Questions About Haier Air Conditioner Troubleshooting
Why is my Haier AC running but not cooling?
The most common cause is a dirty air filter. Clean or replace it. If the filter is clean, check the outdoor unit for debris blocking airflow. If both are clear, the unit may be low on refrigerant – requires a professional with EPA certification.
What does E1 mean on my Haier AC?
Error code E1 indicates a room temperature sensor failure. The thermistor that reads air temperature is either shorted or open. Try a hard reset first. If the code returns, the sensor needs replacement by a technician.
How do I reset my Haier air conditioner?
Perform a hard reset by unplugging the unit or flipping the breaker off. Wait five full minutes. Plug it back in and turn it on. This clears temporary glitches on the control board and clears many error codes.
Why is my Haier AC leaking water?
A clogged condensate drain line is the most common cause. Clear it with a wet/dry vacuum or compressed air. Also check that a window unit is tilted slightly backward so water drains out the rear instead of dripping inside.
How often should I clean the filter?
Clean the filter every two weeks during heavy cooling season. If you have pets or live in a dusty area, clean it weekly. A clean filter prevents ice buildup, improves cooling, and extends the life of your unit.